|
This week I added the display options for when the mesh controllers are created using a new material. I also corrected the naming issue that prevented two controls from being created in the same scene and did a lot of cleanup work in the code so that detection of influence areas works across multiple meshes.
0 Comments
This week I had to re-factor some of the code I wrote for last week's test so that it worked with the revised user input cycle. As you can see in the following video, the tool opens a window which the rigger uses to load controls and joints from the scene, detect the influenced faces and create the mesh control. It has some error handling, specially for the first selections and by not allowing you to click on the buttons until the system has gathered all necessary information. There is currently a bug that stops me from creating a second controller in the same scene due to a naming conflict which I will address next week. I am proud to say that I am almost a week ahead of schedule. After a couple of failures, I found a way to correctly detect the areas of influence that a given joint has over the meshes deformed by its skin clusters. There is still some refinement work that will go into the process, to avoid having overlap between mesh controllers as much as possible (right now areas that share almost equal influence between two joints will map to both of them when running the tool. I also attempted to pause the code's execution so that the rigger can edit the detected area before generating the controls, but have yet to find a solution. The scriptCtx and scriptJob command have yet to yield possitive results with the current flow of the program. To make them work I might need to rework the input cycle I had envisioned. Here is a demo of the tools current state: June 19 to 25:
June 26 to July 2:
July 3 to 9:
July 10 to 13:
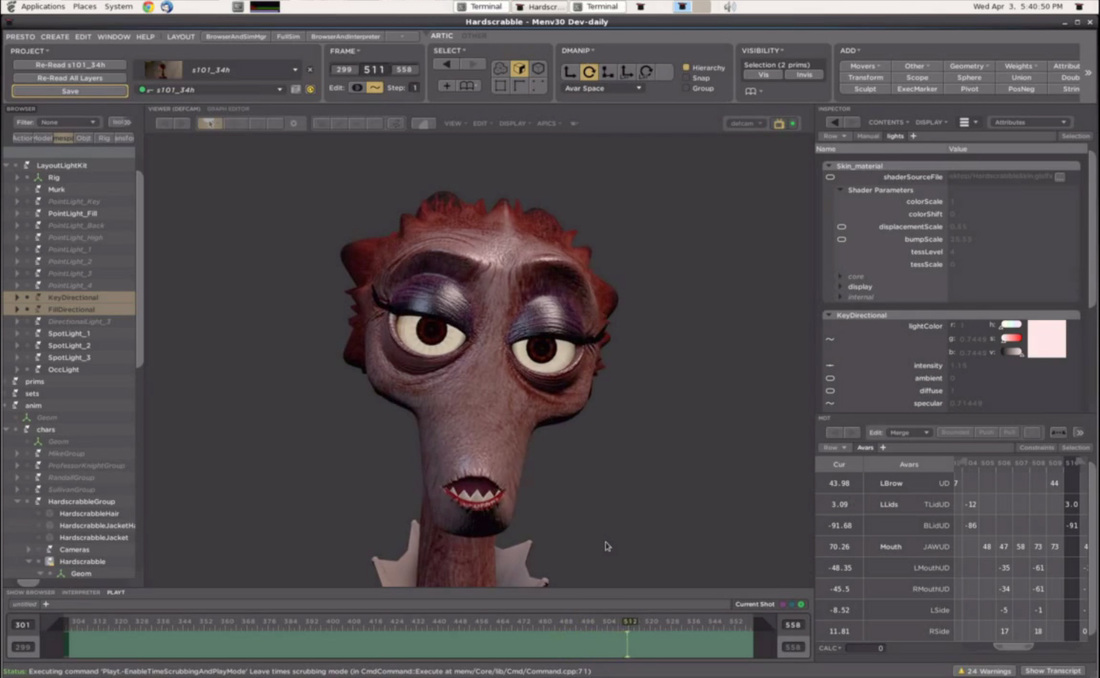
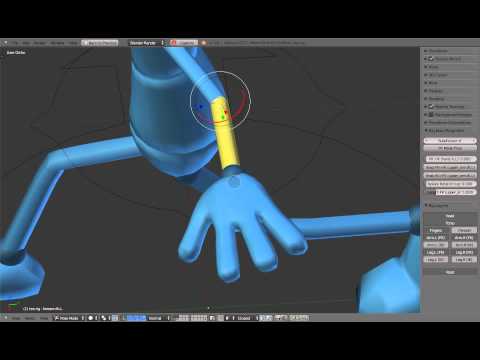
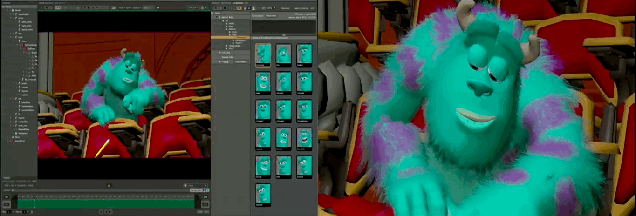
As part of my second Portfolio piece for this summer, I am actually working on two scripts. The first is the Automatic Facial Rigger (more information on this project can be found in its own blog page). The idea for the second one came from feedback one of my classmates got from animators at GDC. She was told that there was a tendency inside the industry for rigs to be built with mesh controls instead of traditional NURBS curves. This creates a more intuitive interface where the animator grabs the actual body parts that he/she wants to move. It also makes picking the controllers a lot easier, since there is an actual surface to grab. After some research, I found out that this method comes from Pixar's Presto software. I also found a video tutorial outlining the steps for creating this style of controls. However, the process is time-consuming and requires the rigger to delete sections of the control mesh so that controllers do not sit one on top of the other. The purpose of the tool is to create an interface that allows the rigger to select either a joint or an existing controller (and it's corresponding joint association), automatically detects the area of the mesh or meshes influenced by that joint, goes through the process of attaching the mesh as a controller to whatever the rigger selected and deletes the unnecessary geometry. It will also offer a secondary interface to allow the animator to toggle the visibility / ability to pick of these mesh controllers as opposed to other means of control (namely NURBS curves). Here are some images and videos to try and exemplify what my target is:
Screenshots of Pixar's Presto Animation software
|

© 2020 Ricardo Medina Fernández